GitHub
We also support Calliope integration with a GitHub pipeline. GitHub is quite similar to GitLab, but the pipeline syntax is somewhat different. In our example, we will run a Cucumber test suite with Ruby 2.7.
Prerequisites
In order to use this feature, you need to have Git installed, similar to GitLab. You then need to create a repository. When you create a new repository from GitHub, you'll get an option to import code from an existing repository. You can choose to import it from our Cucumber boilerplate test suite to test it, or you can just use your own repository.
github-ci.yml
- Go to GitHub Actions.
- Select "setup a workflow yourself".
-
Paste the following code and tweak it to your liking:
# Here we give a name to the whole pipeline. You can call this whatever you want.
name: CI

# Here we decide when we want to run the pipeline.
# In this example we run it whenever a commit is pushed or a pull request is made to the master branch.
on:
  push:
    branches: [ master ]
  pull_request:
    branches: [ master ]

jobs:
  CI:

    # The default environment of a GitHub job is Ubuntu, which we will leave for what it is.
    # We also define a Ruby version, in this example we use Ruby 2.7.
    runs-on: ubuntu-latest
    strategy:
      matrix:
        ruby-version: ['2.7']

    steps:
    - uses: actions/checkout@v2
    - name: Set up Ruby
    # To automatically get bug fixes and new Ruby versions for ruby/setup-ruby,
    # change this to (see https://github.com/ruby/setup-ruby#versioning):
    # uses: ruby/setup-ruby@v1
      uses: ruby/setup-ruby@473e4d8fe5dd94ee328fdfca9f8c9c7afc9dae5e
      with:
        # We use the Ruby version that we just set.
        # This step will also automatically install all the gems with Bundler, so we don't have to explicitly run it.
        ruby-version: ${{ matrix.ruby-version }}
        bundler-cache: true

    # Now we run the Cucumber tests and export their results to a JSON file.
    - name: Run tests
      run: bundle exec cucumber -f json -o output.json -f pretty -c || true

    # Finally we upload the results to Calliope.
    - name: Upload results to Calliope
      run: curl -X POST
           -H "x-api-key:${{ secrets.API_KEY }}"
           -H "multipart/form-data"
           -F "file[]=@output.json"
           "https://app.calliope.pro/api/v2/profile/${{ secrets.PROFILE_ID }}/import/cucumber?tag[]=myos&tag[]=myplatform&tag[]=mybuild"
Info
You may notice the variables contain "secrets." at the beginning, this indicates a GitHub Secret.
You can set these variables up by going to the Secrets section of your repository's settings. -
You can call the file whatever you want, just make sure the filetype is ".yml". In our example we will call it "github-ci.yml".
- Push this pipeline to your master branch.
The following variables are defined inside the pipeline:
API_KEY: Required to import tests to Calliope.pro. Can be found on your Calliope.pro account pagePROFILE_ID: Tests will be imported in one of your profiles on Calliope.pro. You can find the ID in the curl command (see below).
The 'run:' part is the command that is going to run when the job gets triggered.
bundle exec cucumber -f json -o output.json -f pretty -c || trueruns all the Cucumber tests and stores the results in 'output.json'.|| truemakes sure the next commands are also executed when a test fails, because it cancels the whole pipeline otherwise.curl -X POST ...will import the tests into the Calliope.pro platform.
Formatter endpoints
It is recommended to add the formatter to the endpoint to obtain the best interpreted results. More information about the recommended formatters here.
Result
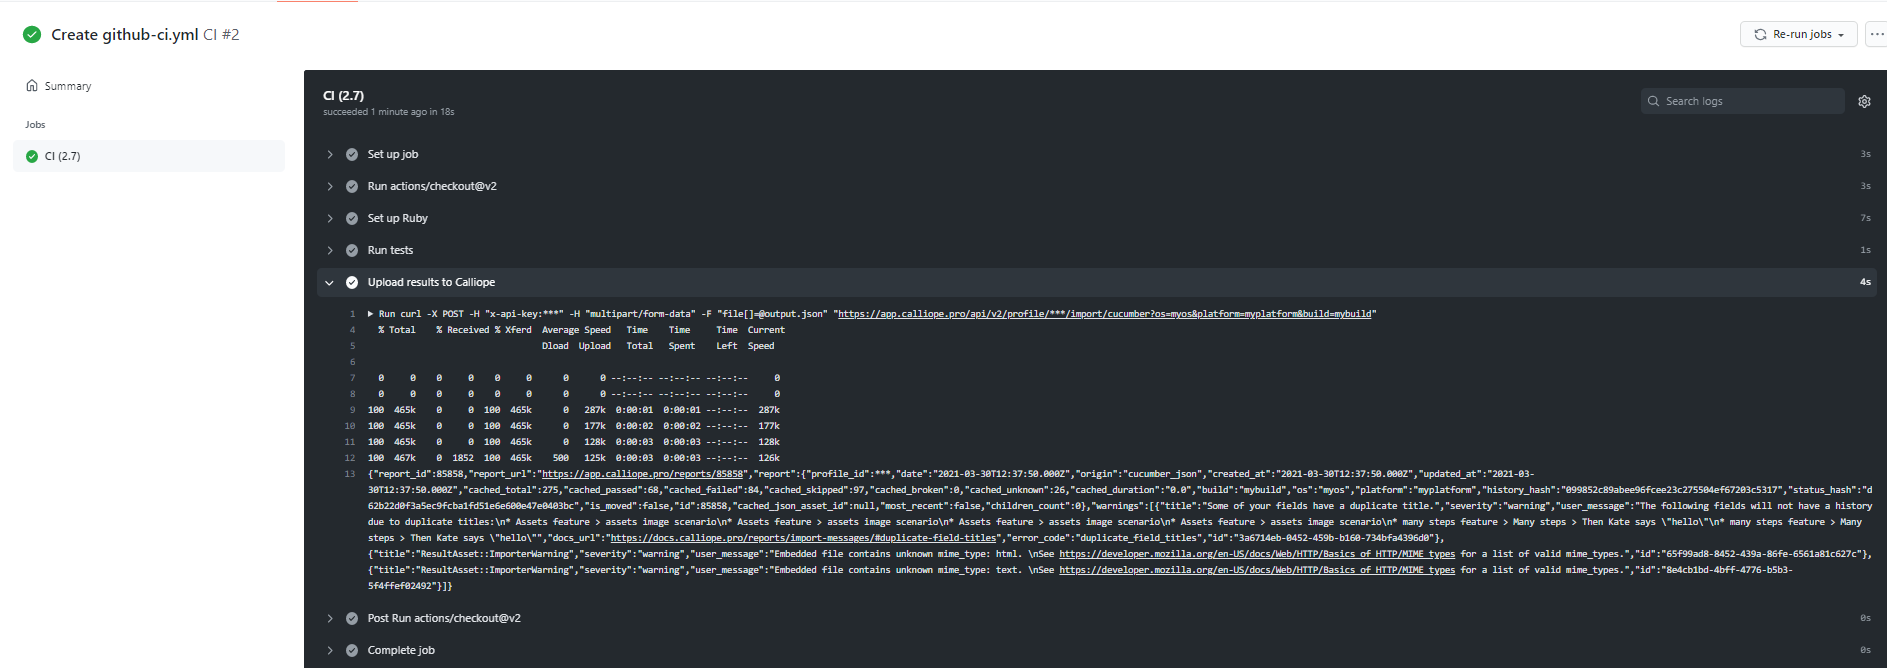
If you did everything correctly, the result of your pipeline should show something along the lines of this:
