Postman API Testing
Postman is a free API testing tool which you can use to quickly set up API requests and modify them accordingly, after reviewing the server's response. It is currently one of the most popular tools used in API testing. With Postman, you can test your API by visually creating your own requests and viewing the results. Some would say that Postman is the GUI version of cURL.
Learn by example
Check out our example Postman repository.
Getting Started
This guide will get you started with using Postman to test API endpoints and importing your own results to Calliope.
To make your very first request, you will first have to select what HTTP response status code. and the body of the response. You can customise data such as the request here..
Authorization
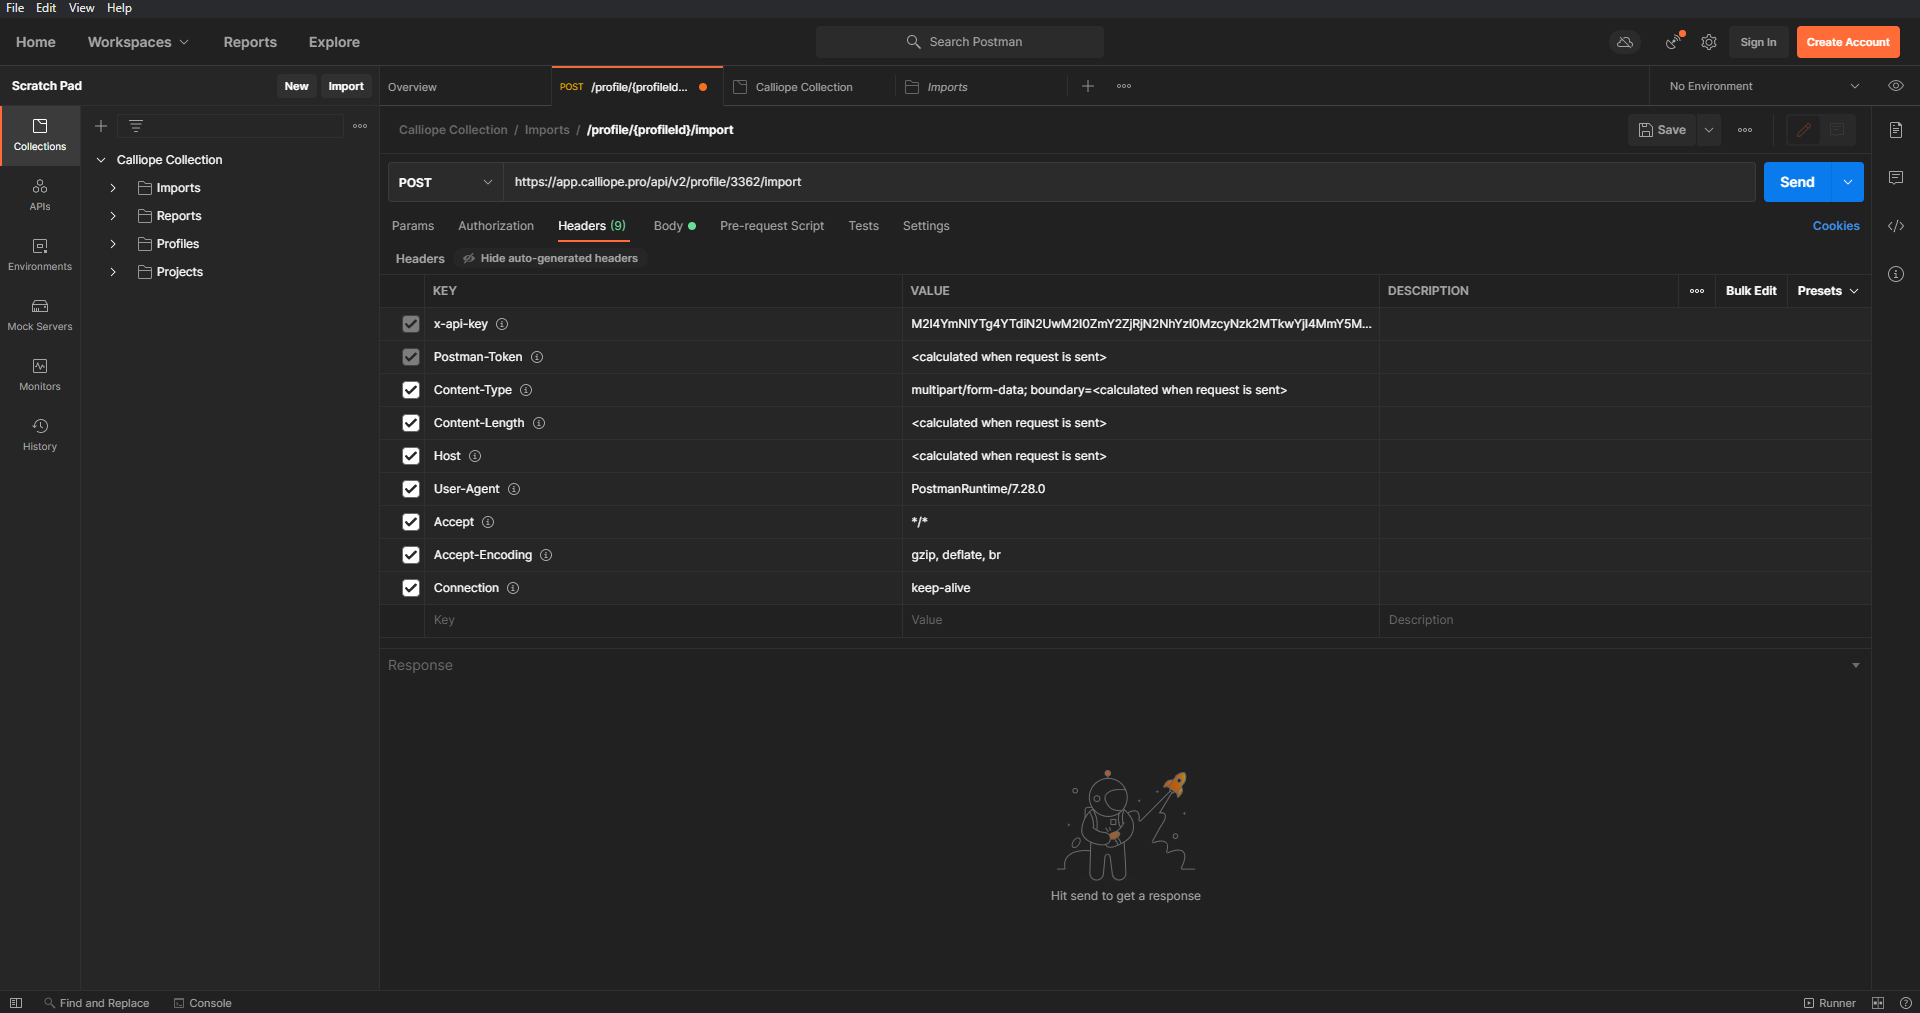
APIs use authorisation to ensure that clients who request data have the correct permissions to request said data. You can pass authorisation details along with any request you send in Postman. It is recommended you use the Authorization tab in Postman to include your API key.
For example, to interact with the Calliope API you would select the type as API key, with as key 'x-api-key', along with your API key as its value. This will automatically generate a header called x-api-key with your API key as its value for this request.
It is recommended you either use environment variables or that you set up authorisation in the parent collection. The benefit of setting up authorisation in the collection rather than each individual request is that all requests in the collection automatically know how to authorise.
GET Requests
A GET request is one of the most common and straightforward types of requests. It often only contains information about who's making the request. For example, GET requests often contain information about the browser that the client uses, and in our example above, the request included an API key for authorisation of the client.
Anytime you visit a website, no matter how basic, your browser is making a GET request to a server, and the server is responding with the HTML, CSS, and JS files that the webpage stores. When you make a GET request in Postman, the server does not specifically know that you are using Postman to make this request, and will respond the same as if you were to visit it with for example Mozilla Firefox.
POST Requests
POST requests are slightly more complicated than GET requests as they often have a request body used, for example, to tell the server to add an entry to the database. Often this is raw JSON data with a content-type of application/json.
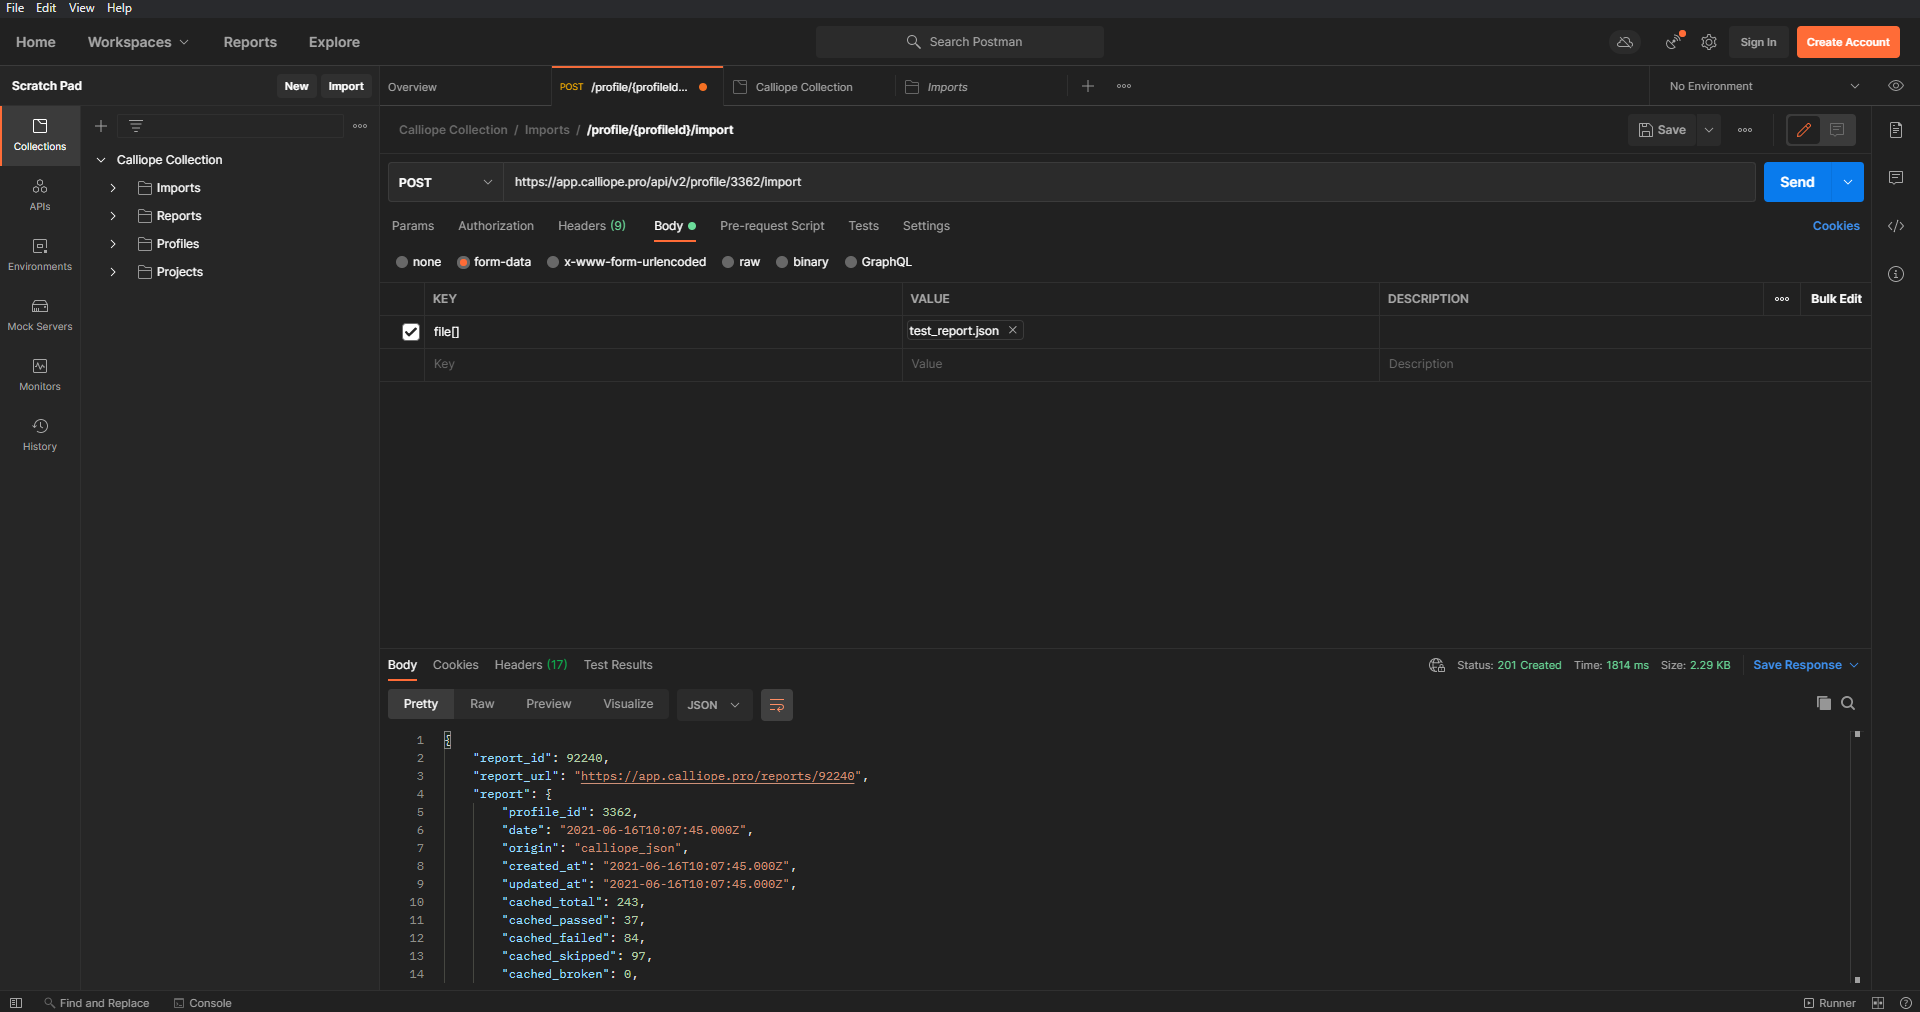
In the context of importing test results to Calliope using POST requests it is useful to know that Calliope does accept JSON but prefers to receive multipart/form-data with file[] as the key for the request body and then select your test result files as the value.
The difference between these two methods is that contrary to a raw JSON body, the uploaded file(s) will include their metadata which Calliope uses to improve your test results.
Newman
To be able to start using your Postman scripts in an automated process, click here. You can read more about how Calliope supports Newman JSON output here.
Calliope Collection
The Calliope Collection is a full set of requests that you can use with the Calliope API. To get started with trying out the Calliope API using our Postman Collection, follow the steps below.
- Download our Postman Calliope Collection here.
- Import the Calliope Collection, called "
Calliope Collection.postman_collection.json". - Right-click the Calliope Collection and click edit then click the Variables tab.
- Fill in your API key as the current value for
apiKey. - If you have no profiles yet, create a company, give it a group and create a profile.
- Now select your newly created profile. The URL will look something like
https://app.calliope.pro/groups/1/profiles/2/reports. - Return to Postman and for the
groupIdcurrent variable enter the number that's behind/groups/in your URL, in our example it's 1. - Now for the
profileIdcurrent variable enter the number that's behind/profiles/in your URL, in our example it's 2. - Make sure that the
baseURLin your request represents the environment you're working on. So sometimeshttps://app.calliope.pro/api/v2needs to change tohttps://your_environment.calliope.pro/api/v2to make the request work. - The Calliope Collection is now set up and ready to go. Click any request and you should be able to fire a request by clicking Send. Import requests require you to select a file first in the Body tab of the request. The ZIP file you downloaded earlier includes an example file for each supported format, at the time of writing.
Integrating with Calliope Gitlab CI
Renaming uploaded file before uploading to Gitlab
After you have made your changes in the Postman, you need to Export your collections by clicking on View More Actions on the collection and Click Export.
If you use Post request in your API Call, you need to rename your upload source:
- Right click and edit your postman collection with notepad++
- Search your Post scenario
- Rename your src file path, for example: C:/Projects/rootmyproject/upload/reports/myfile.json to upload/reports/myfile.json
gitlab-ci.yml setup
The .gitlab.ci.yml file is where we tell GitLab what command to run when a job gets triggered.
To integrate your Postman to gitlab you should use something like this. If you want to know more about
our calliope gitlab integration, simply click this link
variables:
    API_KEY: <YOUR_API_KEY>
    PROFILE_ID: <YOUR_PROFILE_ID>

image:
    name: postman/newman_alpine33
    entrypoint: [""]

stages:
    - test

postman_tests:
    stage: test
    script:
      - apk add zip unzip
      - newman run <YOUR_COLLECTION>.json -r cli,json
      - ls
    artifacts:
      when: always
      expire_in: 1 week
      paths:
        - newman_result.zip
    after_script:
      - cd newman; zip -r ../newman_result.zip *.json; cd ..
      - ls
      - apk add curl
      - >
        curl -X POST
        -H "x-api-key: ${API_KEY}"
        -F file[]=@newman_result.zip
        "https://app.calliope.pro/api/v2/profile/"${PROFILE_ID}"/import" -k
The following variables are defined:
API_KEY: Required to import tests to Calliope.pro. Can be found on your Calliope.pro account pagePROFILE_ID: Tests will be imported in one of your profiles on Calliope.pro. You can find the ID in the curl command (see below).
The 'script:' part is the command that is going to run when the job gets triggered.
newman run <YOUR_COLLECTION>.json -r cli,jsonruns all the Postman tests and stores the results in 'newman/{filename}.json'.- Because newman generate a randomly named file, we need to zip it first using
zip -r ../newman_result.zip *.jsonthis command. curl -X POST ...will import the tests into the Calliope.pro platform.